Wednesday, December 29, 2010

By Popular Demand!

At-Home Gown from McCall’s Needlework, Spring-Summer, 1972

Thanks to the response to the above photo in the Americana Jumper post, I now know I am not alone in my belief that granny squares are the sexiest form of crochet!

True, most of my fellow granny lovers wish to remain anonymous, but who can blame them considering the vitriol often aimed at granny fashion. But I’m unafraid of exposing myself… er, I mean exposing my desire for sexed-up grannies…ah, let’s just say I’m willing to be your spokesperson. And as the newly minted mouthpiece of the Granny Anti-Defamation Society Braving Antagonistic Granny Slander (or G.A.S.B.A.G.S.), I will now defend this granny gown’s honour.

You see, some conscienceless crocheters claim that the worried look on the above model’s face is caused by her fear of being seen in public in her granny garb. It’s true that there is a wary watchfulness about her, but only because, as McCall’s clearly warns, this is a strictly At-Home Gown.

Normally, a dress with granny squares simultaneously outlining and obscuring your every womanly curve would be just the thing to wear to a New Year’s Eve Party. However, combining these seductively smothering grannies with peek-a-boo shells has transformed this sexy shift into an outfit that causes spontaneous orgies.

So, naturally, this model from 1972 is nervous, as the Supreme Court of Canada did not make sexy parties legal until 2005. However, modern Canucks should still proceed with caution before heading out in this merrymaking muumuu. Yes, orgies aren't against the law here, but exercising that right in public could lead to fines, prison time, and severe frostbite.


For the complete pattern (and more Granny Advocacy!):

AT-HOME GOWN

granny squares in bold flag colors accent yoke, straps, sides of white gown done in easy triple crochet pattern stitch. Of Malina Polyester Blend Yarn for 6-16.
Red, white and blue is a popular colour combination for flags! So, you won’t just be the belle of the ball at the American Embassy, the British High Commission, or the French Labour Union. You can also strike a chilly pose in Russia, Norway and Iceland.

Now, the North Korean flag is also red, white and blue, but I wouldn’t recommend wearing this granny gown on their red carpet walkway. For while the North Koreans love their polyester fashion plates, they prefer their sartorial splendor to do a better job of hiding bullet proof vests.

Walk, walk, fashion baby. Work it, move that thing, crazy!
SIZES: Directions for small size (6-8). Changes for medium size (10-12) and large size (14-16) are in parentheses. Note: Crochet hook and gauge determine size.
Body Bust Size: 30 ½’’-31 ½’’ (32 ½’’-34’’; 36’’-38’’).
Blocked Bust Size: 32 ½’’ (35’’-38’’).
For body measurements, see page 28.

Yes, boys wearing shoes can wear this gown with panache.

What? You don’t believe that granny squares on men are sexy? Why just check out Clint Eastwood, circa 1971, in none other than Playboy Magazine:

That’s right, granny square doubters, where’s your God now?
MATERIALS: Malina Polyester Blend Yarn (knitting worsted weight), 5 (6-6) 4-oz. skeins White, main color (MC); 2 skeins Sapphine (S) and 1 skein Carnation (C). For sizes 6-8, crochet hook size F; for sizes 10-12, crochet hook size G; for sizes 14-16, crochet hook size H. (Or English sizes 8, 7 or 6.) Large-eyed needle.

GAUGE: Each square = 3 ¼’’ (3 ½’’-3 ¾’’). See page 24.

YOU MUST BE SURE TO CHECK YOUR GAUGE! You MUST ALSO BE SURE TO DISCIPLINE YOUR GAUGE SWATCH by pinning it down and then spanking it with a ruler.

Spare the swatch, spoil the gown.
Note: Gown is worked from top to lower edge. Squares are sewn on later.
Yes, definitely postpone sewing the squares to later. Why tackle the squares at a relaxed pace as you go along, when procrastinating until finishing means you’ll feel delightfully overwhelmed by the over sixty squares scattered around you.

Without that rush of adrenaline from your last-minute panic, crocheting wouldn’t qualify as an extreme sport, now would it?
GOWN: BACK: Beg at upper edge, with MC and size F (G-H) crochet hook, ch 38 to measure 9 ¾’’ (10 ½’’-11 ½’’).
Row 1: Sc in 2nd ch from hook and in each ch across – 37 sc. Turn each row.
Row 2: Ch 3, 3 tr in first sc, * sk next 3 sc, shell of 4 tr in next sc, repeat from * across – 10 shells.
Row 3: Ch 4, shell of 4 tr in sp between first 2 shells, * shell of 4 tr in sp between next 2 shells, repeat from * across, end tr in top of ch 3 – 9 shells.
Row 4: Ch 3, 3 tr in sp between first tr and first shell, * shell of 4 tr in sp between next 2 shells, repeat from * across, end shell of 4 tr in ch-4 sp – 10 shells. Repeat rows 3 and 4 until piece measures 12’’ from start, end pat row 4.
Inc Rows: Row 1: Ch 3, tr in first tr (1/2 shell made), shell of 4 tr in space between first 2 shells, * shell of 4 tr in sp between next 2 shells, repeat from * across, end ½ shell of 2 tr in top of ch 3.
Row 2: Ch 4, shell in sp between ½ shell and first shell, work in pat across, end shell in sp between last shell and ½ shell, tr in top of ch 3 – 10 shells.
Row 3: Repeat row 4 – 11 shells. Work even until piece measures 20’’ from start, end pat row 4. Repeat inc rows 1-3 – 12 shells. Work even until piece measures 28’’ from start, end pat row 4. Repeat inc rows 1-3 5 times – 17 shells. Work even until piece measures 43 inches from start or about 3 ¼’’ (3 ½’’-3 ¾’’) (top border allowance) less than desired length.

FRONT: Work same as for back.
After all, these granny squares will ensure that no matter how well-endowed you are, your front will appear as flat as your back.

But don’t despair; all the sexiest fashions are completely reversible.


SQUARES: Center front Square: With S, ch 4, join with a sl st to form ring.
Rnd 1: Ch 3 (counts as 1 dc), make 2 dc in ring, ch 1, * 3 dc in ring, ch 1, repeat from * twice, join last ch 1 to top of ch 3 with a sl st (4 groups of 3 dc in round). End off.
Rnd 2: Join MC in a ch-1 sp, ch 3, 2 sc in same sp, ch 1, * 3 dc in next ch-1 sp, ch 1, 3 dc in same sp, ch 1, repeat from * twice, 3 dc in same space with first 3 dc, ch 1, join with a sl st to top of ch 3. End off.
Rnd 3: Join C in corner ch-1 sp, ch 3, 2 dc in same sp, ch 1, * 3 dc in next ch-1 sp, ch 1, (3 dc, ch 1, 3 dc) in corner ch-1 sp, ch 1, repeat from * around, end 3 dc in same space with first 3 dc, ch 1, join with a sl st to top of ch 3. End off.
A Square: Make 36 (34-32) squares same as center front square, working rnd 1 with C, rnd 2 with MC, rnd 3 with S.
B Square: Make 37 (35-33) squares same as center front square, working rnd 1 with MC, rnd 2 with C, rnd 3 with S.
Despite my allegiance to G.A.S.B.A.G.S., I’d be remiss if I didn’t mention that there’s still time to turn your red, white and blue at-home gown into a far-away flag for the Faroe Islands.

Although, as the Faroe Sheep is on their coat of arms, making their flag out of polyester wool is tacky, at best. And considering a dinner party snub there caused an international incident, your granny flag could lead to all out war.
FINISHING: Front: With center front square at center, arrange 5 squares across top, 14 (13, 12) squares down each side, alternating A and B squares. With S, sew squares tog. Pin top and side edges of front to inner edges of squares; sew tog.
Back: Work same as front, using a B square for center top square.
Block pieces to measurements. Weave side seams 20’’ down, leaving lower edges open for slips.
That’s right, you’re going to want to show a little leg, you granny square hussy!
Sew 4 squares tog for each strap. Sew front end of straps to 2nd square in from side seams. Cross straps and sew to back.
And now you’re ready to crash sexy parties and cause international mayhem with your new granny garment. Or you could stay at home, and ring in the New Year curled up with a special someone in granny square bliss.

Either way, Handmade by Mother wishes you a Happy New Year filled with kooky knits and crazy crochet!

Click here for the printable pattern.

Friday, December 24, 2010

Sensational doesn’t mean what you think it means.


Dritz Art Needlework Ad from McCall’s Needlework & Crafts, Winter 1978

Unless, during the 1970s, sensational was a synonym for bleak and depressing.

To be fair, being a survivalist was a lot tougher those days. There were no websites to provide tips on how to decorate your bunker for Christmas, or what gifts to buy relatives who refuse to prepare for the collapse of Western civilization.

So back in 1978, Brenda heroically tried to brighten up her basement bunker by flinging needlepoint pillows hither and yon. However, despite their striking dimensional effect, her Dritz® Art mini-pillows proved to be no protection when Commie Santa came to town.


For more 1970s survivalist decorating ideas:

Ah Christmas Eve, a time of joy and celebration even if you lived in a disco era bomb shelter. After the kids fell asleep in their sleeping bags, visions of canned goods and gold bars dancing in their heads, Brenda put up the artificial tree. Then she hung the unbreakable ornaments, draped the flame-resistant garlands, and broke out hypoallergenic fiberfill snow for under the tree.

Still, Radioactive Rudolf had nothing but contempt for her efforts.


Rudolph couldn’t forgive Brenda for using up all her red yarn giving Mr. and Mrs. Claus glowing red noses. But everyone knows that reindeer are useless during a nuclear winter.

But come Armageddon, Rudolf, Christmas Mouse, Mutant Mutt, Frosty and his Mini-Me will be grateful for Brenda’s indoor/outdoor turf carpeting. Those synthetic fibers are guaranteed to survive anything short of a direct hit from an atom bomb. Plus, the wood paneling on the wall is actually made of Laminex® – wipes clean and blocks radiation!

Even Brenda’s needlepoint Christmas wreath (decorative bar not included) has been constructed out of apocalypse-resistant acrylic yarn.


Sometimes Brenda fantasizes about going outside to see real trees and grass, but then she thinks, “What if today is the day they drop the bomb?” You see, she’s been living in this basement since Sputnik launched in 1957, and only captured found a husband when an unsuspecting plumber stumbled into her shelter in 1972.

Gazing at the locked, blast proof doors, Brenda decides she can’t chance the Soviets sending Merry Missiles for Christmas. So she reaches for another Dritz® Art Needlework Kit, thankful that they deliver during the end times.


Weird Al Yankovic - Christmas At Ground Zero (Official Music Video) - The best video clips are right here

Thursday, December 23, 2010

You Better Watch Out...

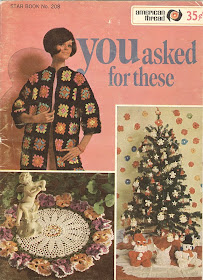
Large Santa Claus from “YOU asked for these”, Star Book No. 208, c. 1965

You better not cry,
You better not pout,
I’m telling you why...

Because not only is Santa Claus coming to town, he’s bringing what YOU asked for!

Yes, YOU asked for a shapeless granny square pullover. YOU asked for a useless doily for your disco dancing cherub. And, since you’re a sucker for punishment, YOU also asked for a “Large Santa”.


Clearly, YOU should be a lot more careful what you ask for.

Boy, Large Santa sure looks cranky. It’ll take a lot more than an offering of milk and cookies to placate him. Maybe next time you’ll remember that Kris Kringle prefers the nickname Big-Boned Santa.

For the complete pattern (and more snark!):

Yikes, never mind cranky! Large Santa’s come to life and he’s out for vengeance!

So what if he’s only 18 inches tall and made of yarn? Just look at that murderous expression, and remember, he knows when you’re sleeping...
Large Santa Claus

Materials Required:
AMERICAN THREAD
“AUNT LYDIA’S” HEAVY RUG YARN
7 – 70 yd. skeins Red.
1 – 70 yd. skein White
3 Black Buttons
1/3 yd. Red Felt
This year, instead of dreaming of sugarplums, your children will be lying awake in terror, listening for the sound of woolly feet stomping across the floor.
BODY: Wind 5 skeins of Red over an 18 inch cardboard, tie with a double strand of yarn at one end for top of head. Tie tightly about 3 ½ inches from top of head for neck. Divide remaining yarn in half for legs and tie each section about 2 inches from each end. Cut and trim for feet.

ARMS: Wind 2 skeins of Red over a 14 inch cardboard, tie 2 inches from each end for hands, then tie each side about 3 ½ inches from each hand tying for shoulders, insert through center of body. Tie about 5 inches from neck for waist. Cut and trim for hands.

Sew buttons in place for eyes and nose.
Don’t let Santa’s jolly old elf act fool you – he’s as judgmental as he is jolly. And if you’ve been very naughty, he’ll deliver those lumps of coals with a twelve gauge shotgun!


HAT: Cut a triangle 16 ½ x 14 ½ x 14 ½ inches of Red felt. Fold and seam the two 14 ½-inch edges tog for back seam. Turn about ½ inch under and tack in position to head. Finish with a pompon.

POMPONS: Wind White 40 times over a 2 inch cardboard, slip off cardboard, tie in center, cut both ends, trim into shape. Attach to top of hat. Work 2 more pompons, and attach in place for buttons.
This Large Santa doll will reinforce the lesson that children should always approach any Santa with extreme caution. After all, according to the Mayan calendar, every 1,000 years Santa completely loses his Christmas cheer.


WHISKERS: With White work a 7 inch ch. Cut yarn into 6 inch lengths. Fold 4 lengths in half and knot through each ch. Bush slightly and trim.

MUSTACHE: Cut 10 strands 10 inches long. Tie in center. Sew in place. Brush and tirm..

EYEBROWS: Take 4 strands 1 ½ inches. Tie in center. Open strands. Glue in place.
Make those eyebrows extra bushy, to enhance Large Santa’s glare. Then prop up the completed toy beside your children’s bedside, as a reminder that they better be good... or else St. Nick will take them to his North Pole Sweatshop where stunted, malnourished children (AKA elves) work non-stop making toys for better-behaved girls and boys.

You asked for it, kid!

Click here for the printable pattern.

Tuesday, December 21, 2010

Have a Swanky Solstice!

Ribbon Art, c. 1920

Ribbon Art: How to make Hundreds of Dainty and Practical things of Ribbons Illustrated in Colors with detailed instructions
Detailed instructions -- that’s very promising. Just imagine all the authentically Dainty and Practical 1920s accessories we can make! We’ll be the cat’s meow!
Fashion and Ribbon

MORE and more, the important costume designers and smart interior decorators employ the ever adaptable and colorful ribbon.

TO the return of simple classic lines in dress, we may attribute the increasing appearance of ribbon in fashion.”
1920s fashion was much more than just a return to simple classic lines. Dames divested themselves of their confining costumes and flung themselves into blatantly pagan partying.

Notice how the gentleman in the second picture can’t take his eyes off her arrow-shaped, bawdy bow. 1920s gold diggers were well aware of the hypnotic properties of ribbon, using its satiny sheen to ensnare unwary men and bind them to their will.

In fact, see the doll face on Ribbon Art’s cover? Not the kid, I mean the full-grown tomato. Sure, she’s sitting demurely in her wicker chair, sorting her craft supplies. But get an eyeful of her strappy heels and her plunging neckline. She’s no matronly Mrs. Grundy. This Sheba’s a sorceress, wrapping men around her finger with as much ease as she wraps that ribbon.

I bet we’ll discover all her pagan beauty secrets inside...

For more ribbony magic:

In accessories to the costume – by way of adding a necessary color note and hint of frivolity, ribbon fills a most important need.”
You better believe that ribbon fills the most important needs of life. Why without ribbon, life is just not worth living.

But ditch the beret and don some ribbon with a note of colour and a hint of frivolity, and you’ll soon turn that bow-like frown upside down.
You will find in this book, over a dozen pages of cocardes and trimmings – easily and inexpensively made – which will lend a picturesque quality to the smart gown. And of girdles and corsages there is a wide variety. With a few, simple dark dresses and a half dozen or so of these new accessories, the clever woman can make her costume seem always interesting and different.
Are you a clever woman or a dumb Dora?

Actually the real question is: Do you have a clue what a cocarde is?

Cocardes are those ribbony things at the bottom of the page. You stick these things on other things, and your crown is instantly glorified. Or something.

Suffice to say, your friends will think you’re the cat’s pajamas if you go to the Solstice party with a giant cocarde stuck to your hat.

Yes, that’s a good thing! Would I lie to you?
For hat trimmings, we are picturing a host of ideas featured by the advance models just now shown in Paris.

These trimmings are essentially simple and therein lies their charm. For a woman with but a slight knack with the needle can make them successfully. And many women will make several trimmings for the one hat – each trimming entirely changing its character.

On page 29 are shown five ways to trim one hat. And you could multiply the five ways five times without exhausting the ribbon trimming possibilities.

The last design is called The Princess Leia.
Purses – bandeaus – hair ornaments – scarfs – shoe cocardes – all have been executed for costume effect.
As opposed to executed for comedic effect.
We have endeavored in this book to feature only those that can be made without difficulty and that have definite claims to lasting smartness. It is by such accessories as these that the widely dressed woman wins and holds her reputation for smartness.

In baby things...

Babies in the 1920s were made of sterner stuff than today’s tots. Mothers back then didn’t have to worry about choking hazards, and could safely drape them in ribbon and tiny cocardes from head to toe.

Whereas, babies today have to be watched constantly as they’re apparently determined to kill themselves with anything they can get their hands on, even dog hair!
... in boudoir luxuries, and in lingerie, ribbon is more than a fashion. The newest ideas which the exclusive ships are continually originating – the clever, unusual thoughts – we are illustrating here in great profusion. They make charming gifts and proud possessions.

For the lamp shades and cushions and various articles of home decoration features in the following pages, we sought out the smartest interior decorators. It is their opinion that ribbon because of its color value and texture sympathy is the most artistic medium in which to develop the accessories which give a personal touch to the home.
While ribbon certainly has its place in pagan celebrations, I believe it makes for very impractical home decorations.

Plus dancing around a maypole indoors is clearly as much fun as a stock market crash.
To women who want color and interest in their apparel and clothing, who wish to influence their children’s lives by tasteful surroundings, this book is dedicated.”
But never mind the dust. Never mind the strangling hazards inherent in hanging ribbons around your house. If you don’t buy this book you are a BAD MOTHER and your children will grow up to be uncultured BARBARIANS.
“It is published with the hope that it may prove to be a practical help and inspiration to those in the quest of beauty.”
That, and they hoped to get very rich by starting a ribbon publishing empire.

But let’s take a look at what actual ribbon art patterns we can make.

OMG, it’s a BRA made of RIBBON! I want one! I want one now!

Now let’s read the detailed instructions we were promised...
The brassiere illustrated above is essentially practical and one can easily afford several if one makes them at home of ribbon. The yardage depends on the bust measure. For the shoulder straps and the binding on the top and bottom edges 1-inch satin ribbon is used.
Well, that was... less than enlightening.

There is no indication what the bottom strap of the bra attaches to. Although from the illustrations on the next page we can deduce that a 1920s woman’s boudoir was the place where she played dress-up. So I suspect the strap attaches to something salacious.

Oh look, I’ve finally found a page of instructions!

None of which apply to bra-making.

Oh well, it’s not as if a 1920s flapper needed a well-engineered bra – or any bra at all.

Is she wearing a bra? Only one thing is certain, this hotsy-totsy isn’t wearing a corset.

So, there will not be a printable pattern this time around as there are NO ACTUAL PATTERNS.

Not that I’m bitter, or anything... But if the saps who created this flat tire of a book were still around, I’d ask my hard-boiled pals to give them the bum’s rush.

I mean, Happy Solstice!

Thursday, December 16, 2010

How the Grinch Stole Christmas Snowflakes

Snowflake Mobile from Crochet World Omnibook Christmas Special, 1980

This photo is stark warning to us all. Don’t leave your Snowflake mobile unguarded for a single second this holiday season. Otherwise, the Grinch will leave nothing but hooks and some wire.
SNOWFLAKE MOBILE By Betty Leach
Hey, this is the same Betty who brought us the Happy Hanukkah UFO! So, by all means make both crafts to decorate your child’s nursery for ChristKwanukkah.

No? Hanumaszaa?

Kwanukkamas?

Hey, you’re not going to trick me into saying anything dangerous like Happy Holidays.
What could be more fun to make than a Christmas mobile?
Seriously? What could be more fun than suspending flimsy thread snowflakes from a crochet covered Cuban cigar?

Well, Betty, since you asked, I’d have more fun making Tuna Can Santa, Flat Santa and my personal favourite, Undead Santa. Plus I could sleep peacefully at night knowing that these Christmas Crafts would teach my kiddies the Timeless Truth that Santa Claus is Real!

Whereas your Snowflake mobile will convince my children that snowflakes come from the Big Pompon in the Sky thus destroying any chance of them getting into MIT and supporting me when I’m old and crocheting crotchety Christmas crafts.

Thanks for asking!

For the complete pattern (and more snark!):

SNOWFLAKE MOBILE
By Betty Leach

Snowflakes are the dangling objects ‘d’ art of this design.
According to the dictionary, Objets d’art are objects with artistic value. Whereas, objects ‘d’ art are objects which end up on Regretsy.
MATERIALS: 1 4-oz. skein 4-ply yarn in red and small amount of white; gold cord; pipe cleaners; white glue and straight pins; size I crochet hook; Knit-Cro-Sheen and size 8 crochet hook; Susan Bates Jumbo Pompon maker; 1 9’’ Styrofoam ring.
Because Susan Bates knows you can’t be trusted to make your own pompons.


COVER FOR RING: With I hook and red yarn, ch 18, dc in 3rd ch from hook, dc in remaining ch sts. ch 3, turn.
R 2: Dc in first dc and remaining dcs, working in back loops only. DC in top of turning ch – 15 dc, counting ch 3 as first dc. Ch 3, turn.
R 3: Repeat row 2 for 32 rows. Sl st first and last rows together to form ring. End off.
Place crocheted ring around Styrofoam ring and whipstitch edges together on inside of ring.

HANGING CORDS: Leave a 6’’ length of yarn, with red ch 61, end off leaving 6’’ length. Go back to center of ch, leave 6’’ length, join yarn in center ch and ch 30. End off, leaving 6’’ length. Take the 3 6’’ lengths and sew evenly spaced around edges of crocheted ring.
Turns out I owe Betty an apology. She didn’t hang her snowflakes from an ugly crochet-covered cigar as the photo led me to believe. She hung them from an ugly crochet-wrapped Styrofoam ring.

My bad!
POMPON

Make according to directions with red yarn, making one 4 ½’’ pompon. Or you made use a piece of heavy cardboard cut 4 ½’’ wide, winding yarn around cardboard 212 times.
Take top 6’’ length of hanging cord and tie securely to bottom of pompon. Take a 24’’ length of gold cord and tie to top of pompon, tie a knot at the end of gold cord to hang from ceiling hook.

FINISHING: Attach snowflakes with thread or fine gold cord around crocheted ring, hanging them at different lengths. Make bows from gold cord and attach with glue or pins to edge of crocheted ring, spacing them evenly around.
Pins? This certainly isn’t a toy for children.

Unless they’re on Santa’s naughty list.


Make candy caned by dipping pipe cleaner in white glue, take one strand of red and one strand of white yarn, holding the yarn together wrap around pipe cleaner. Let glue dry, cut pipe cleaner in half, end one end cane, tie bow at crook. Attach to edge of disk with glue or pins.
Dipping the entire pipe cleaner into white glue is a bit excessive. You better show more restraint than Betty did, or you won’t have enough white glue left over to finish your granny square cube.

FINISHING OF ALL SNOWFLAKES

Use liquid starch full strength, dip snowflakes into starch until they are thoroughly saturated. Squeeze out excess starch, pin snowflake into shape on flat surface and let dry completely. When dry, remove pins and run a length of thread through any top loop to form hanger.

MATERIALS: Knit Cro-Sheen, No.8 crochet hook.

No.1 SNOWFLAKE

Ch 8, join to form ring.
R 1: Ch 3, 4 dc in ring, * make popcorn stitch over those 5 dc. To make popcorn stitch remove hook from last dc made, insert hook into top loop of first dc and into last dc, thread over hook and draw through. Ch 5, repeat from * 4 times, repeating, ending with ch 3 and dc in top of first popcorn st.
R 2: * Ch 10, sl st in 3rd st from hook, ch 7, sl st in 3rd ch from hook, ch 7, sl st in 3rd ch from hook. Sl st in 1st ch 3 picot. Ch 7, sc in same space. Ch 5, sc in next space *. Repeat from * to * around. Ch 5, join with sl st to starting ch 10. End off.
Yes, this is merely Snowflake No. 1 out of 10! Now, other bloggers would try to fool you into believing there were only three variations of snowflakes and spend the rest of her leisure time watching TV and eating bonbons.

These deceptive bloggers are known in the blogging biz as sane, rational adults.

No.2 SNOWFLAKE

Ch 8, join with sl st.
R 1: * ch 7, sc in ring. Repeat from * 9 times. Join with sl st in base of first loop.
R 2: Sl st to center ch of first loop, sc in loop, * ch 9, sc in next loop. Repeat from * around. Join last ch 9 to first sc. End off.
R 3: Join thread in any ch 9 loop. * Ch 4, work a 5 trc cluster in loop. Ch 8, sc in 3rd ch from hook, * ch 3, sc in first sc. Repeat from * once.
I’m not sure if you’re supposed to repeat from the * before Ch 4 or the * before Ch 3. I suggest you do both just to be safe.
Ch 5, work another 5 trc cluster in same loop. Ch 7, sc in next loop. Ch 3, sc in same sc (picot made). * Ch 7, sc in next loop. Repeat from first * around. End with picot, ch 7 and join to bottom of first trc. End off.

No.3 SNOWFLAKE

Ch 6, join to form ring.
R 1: Ch 3, work 11 dc in ring, join to top of ch 3 – (12 dc).
R 2: * Ch 7, skip 1 dc, sc in next. Repeat from * around. End with sl st in base of first ch.
R 3: * 4 sc in first loop, ch 14, sl st in 3rd ch from hook. Ch 7, sl st in first sl st, ch 3, sl st back to first sl st. Ch 11, 4 sc in same loop. Ch 5, sl st back to 3rd ch from hook. Ch 2, repeat from * around. Join with sl st in first sc. End off.
Whoa, Betty likes overusing the * as much as she revels in overusing glue.

When will people realizing that asterisk abuse is a gateway to comma crime, semi-colon sins and the exploitation of exclamation marks!!!!!

No.4 SNOWFLAKE

Ch 6, join to form ring.
R 1: Ch 3, 17 dc in ring, join to top of ch 3 – 18 dc.
R 2: Ch 3, 2 dc in joining space, ch 2, 3 dc in next dc. * Ch 3, skip 1 dc, 3 dc in next dc, ch 2, 3 dc in next dc. Repeat from * around. End ch 2, sc in top of first ch 3.
R 3: Ch 15, sc in 3rd ch from hook, * ch 3, sc in next ch. Repeat from * to base of ch 15. Ch 1, turn, work ch 3 picots up opposite of ch 15. Join with sl st to top picot. End off.
R 4: Join thread in next ch 3 space. Repeat R 3.
R 5: Repeat R 3 and R 4 around. Twist each spoke after starching and let dry thoroughly.

No.5 SNOWFLAKE

Ch 8, join to form ring.
R 1: Ch 3, * dc in ring. Repeat from * 11 times. Join to top of ch 3.
R 2: * Ch 5, sc in next dc. Repeat from * around. Join in first ch of first loop.
R 3: Sl st to center ch of first loop. * Ch 7, sc in 3rd ch from hook. Repeat from * 6 times. Sl st in sc of first picot, ch 4, sc in loop. Sc in next ch 5 loop, (ch 3, sc in same loop) 3 times. Sc in next loop. Repeat from * around. Join with a sl st to first sl st of previous row. End off.
Or maybe all of these *’s aren’t really asterisks. Perhaps, Betty sees them as typographical snowflakes, turning her instructions into a Winter Wonderland.

Bloody annoying, either way.

No.6 SNOWFLAKE

Ch 5, join in first ch to form ring.
R 1: * Ch 10, sl st in ring *, repeat from * to * 4 times.
R 2: * Sl st to ch 10 loop. Work 15 sc in loop *. Repeat from * to * for each loop. Join in first sl st. End off.
R 3: Join in 7th sc of first loop. * Ch 15, work sl st in 3rd ch from hook for picot. Ch 12, skip 1 sc, sc in next sc, ch 8, sl st in 3rd ch from hook for picot. Ch 5 sc in 7th sc of next loop *. Repeat from * to * around, ending ch 5, sl st in joining. End off.

No.7 SNOWFLAKE

Ch 10, sl st to first ch to form ring.
R 1: Work 15 sc in ring, join with sl st in first sc.
R 2: Ch 3, 2 dc in same space as sl st, * ch 3, skip 2 sc, 3 dc in next sc *. Repeat from * to * around – 5 dc groups. Join with sl st to top of first ch 3.
R 3: Sl st to ch 3 space, ch 9, sl st in 3rd ch from hook for picot. Ch 8, sl st in 3rd ch from hook for picot. * Ch 3, sl st to base of last picot made. Repeat from * to * once.
Great, now we’re missing asterisks in these instructions. I’m beginning to understand why the snowflakes in the photo appeared… how do I put it nicely? Malformed? Misshapen? Misfits?

Misfits! That’s what these snowflakes are.
Ch 8, sl st in 3rd ch from hook (picot), ch 6, sc in ch 3 space. Repeat from beginning of round 4 times. Sl st in first sl st. End off.
Everyone sing together!

We’re on the Island of Misfit Flakes
Here we will melt away
We want to snow
On Santa Claus
And ice up his magical sleigh!

No.8 SNOWFLAKE

Ch 6, dc in first ch. * Ch 3, dc in same ch *. Repeat from * to * 4 times – 6 loops. Join to top of ch 3.
R 1: * Sl st to loop, ch 7, sc in same loop, ch 7, sc in same loop *. Repeat from * to * 5 times – 12-ch 7 loops. Join with sl st to first sl st. End off.
R 2: Join to top of any ch 7 loop with sl st. * Ch 4 (for first trc), work 3 trc, ch 7, 3 trc in loop. Ch 7, skip 1 loop. Repeat from * to * 5 times. Join to top of first trc.
R 3: * Sl st to ch 7 loop. (Ch 3, sl st in loop) 3 times. Ch 15, sl st in 5th ch from hook, ch 10, sl st in same ch 7 loop. (Ch 3, sl st in loop) 3 times. Sl st to next ch 5 loop, work (ch 3, sl st in loop) 5 times *. Repeat from * to * around. Join with sl st to first trc. End off.

Snowflakes for toys
Bring frostbitten joys
For millions of girls
And for millions of boys
When the Christmas Flakes are here
Every day seems like it lasts for a year.

No.9 SNOWFLAKE

Same as No.8, only make 5 loops, instead of 6.
R 1: Sl st in space, ch 4 (counts as 1 trc), work 6 trc in same sp. * Ch 3, 7 trc in next space *. Repeat from * to * around. Join with sl st to top of first trc.
R 2: Sl st to 2nd trc, ch 4, holding back last loop on hook, trc in each of next 4 trc, thread over and through all loops on hook (5 trc cluster made). * (Ch 8, sl st in 3rd ch from hook) 5 times. Join last picot to first picot made with sl st. Ch 5, sl st to top of cluster. Ch 5, sl st in ch 3 space, ch 5, work 5 trc cluster over center 5 trc *. Repeat from * to * around. Join last ch 5 to top of first cluster with sl st. End off.

An ice cube for Jimmy
A slush ball for Sue
The kind that will give you a bad case of flu.
When the Christmas Mobile’s here
Disappointment replaces holiday cheer.

No.10 SNOWFLAKE

Ch 7, join with sl st to form ring.
R 1: Ch 3, 11 dc in ring. Join to top of ch 3.
R 2: * Ch 5, sc in next sc, ch 12, sc in next sc *. Repeat from * to * around, ending last ch 12 with sl st to base of first ch 5.
R 3: Ch 1, turn – working in long loops only, * 12 sc in loop, pushing ch 5 loop to back of work *. Repeat from * to * around. Join to first sc. Ch 1, turn.
R 4: Sl st over 5 sc, * ch 5, sl st in same st, sl st in next st *. Repeat from * to * twice. Sl st over next 10 sc. Repeat from first * around. Join with sl st to first sc. End off.
At last, you’re done! But it’s still not too late to use your Misfit Snowflakes for good rather than evil mobiles.

For instance, you could smush all the crochet snowflakes together to form a snowman hat for your dog. There’s no way that could be evil!


Click here for the printable pattern.

Tuesday, December 14, 2010

Stocking Setbacks

Stocking Place Mats from Crochet World Omnibook Christmas Special, 1980

Stocking Place Mats
By Carol Ann Nadeau

To add a festive touch to your holiday table we present this stocking place mat. Children will especially love the way the stocking holds their utensils and napkin.
Adults, on the other hand, will be especially annoyed by how their wine glass keeps falling off this lumpy, crocheted placemat.
These colorful Christmas Stocking Place Mats will brighten any Christmas luncheon table setting. Imagine your guests surprise when they find their napkins tucked neatly inside their own little Christmas stocking!
Yes, your guests will be surprised when you brighten your Christmas luncheon with a scavenger hunt.

Spoiler alert: The glazed ham is behind the sofa cushion.
The fork, knife and spoon will fit inside too, if you wish, and these place mats are perfect for buffet lunches as well, since everything needed is right there in each stocking.
I can visualize your buffet now:

There’s a pyramid of neatly rolled placemats stacked beside the festive food spread over your dining room table. “Take one of the Christmas placemats I made,” you urge your guests. “All your silverware is inside the stocking. It’s that the cleverest thing?”

Your elderly neighbour, Mrs. Higginbottom, bravely takes a Christmas Stocking placemat, and sits down on the living room couch. All is well, until she attempts to unroll the merry mat over her knees while holding a full plate in her other hand.

The fork, spoon and knife hit your white shag carpeting first, followed in short order by the deviled eggs, tomato aspic, cranberry sauce, roast turkey and fruit cake. Yes, these Christmas Stocking Placemats are perfect... a perfect catastrophe.
So, give your holiday entertaining that extra special personal touch this year with Christmas Stocking Place Mats you made yourself and have a very warm and happy holiday season!
Replete with spilled wine, stained carpets, and ruined clothes. After all, Christmas isn’t Christmas without tears and recriminations!

For a pattern guaranteed to ruin the best-planned Christmas Buffet:


CHRISTMAS STOCKING PLACE MATS

MATERIALS: Knitting worsted weight yarn, 4 oz. skeins, 2 each dark green and white, 1 red (makes 3 place mats); crochet hooks sizes H&K.

FINISHED SIZE: Each mat measures approximately 12’’ x 17’’ including edging.

NOTE: Place mats are worked with 1 strand of dark green and 1 strand of white held together throughout.
ADDITIONAL NOTE: These place mats are one use only. No matter how washable your wool is, there’s no way you’ll get all the dried up bits of sausage stuffing and figgy pudding out of your encrusted placemats.
PLACE MAT

With 1 strand dark green and 1 strand white and size K hook, ch 47 to measure about 15’’.
ROW 1: Sc in 3rd ch from hook, * ch 1, sk 1 ch, sc in next ch, repeat from * across (23 sc). Ch 2, turn.
ROW 2: Sc in next ch 1 sp, * ch 1, sc in next ch 1 sp, repeat from * across ending with ch 1, sc in turning ch 2 sp, ch 2, turn. Repeat row 2 until piece measures about 9’’ from beg. Do not break yarn but turn and work edging as follows: * Ch 6, sc in 3rd ch from hook, ch 3, sl st in next sc, repeat from * along wide edge, ch 6, sc in 3rd ch from hook, ch 3, sl st in next row, ** ch 6, sc in 3rd ch from hook, ch 3, skip 1 row, sc in next row, repeat from ** along side edge. Work along other wide edge and other side edge to correspond. End off.
Besides, after this year’s Christmas buffet catastrophe, you won’t need these placemats again. Next year you’ll be crocheting the whole darn dinner.

I recommend you place your crocheted creations on your best dinner platter, and enter the dining room screaming, “Try staining my carpet with THIS you slovenly swine!”

I guarantee that you’ll never again be asked to host a family holiday fête.
STOCKING

With single strand of red and size H hook, ch 18.
ROW 1: Sc in 2nd ch from hook and in each ch across. (17 sc) Ch 1, turn, each row.
ROW 2: Working in sc, dec 1 st at beg and end of row (to dec: pull up a lp in each of next 2 sc, yo and through all lps on hook – 1 dec made).
ROW 3: Work even in sc. Repeat rows 3 & 3 until 9 sts remain.
ROWS 9 – 12: Work even in sc.
ROW 13: Working in sc, inc 1 st at beg and end of row (to inc: work 2 sc in same st – 1 inc made), (11 sc).
ROW 14: Repeat row 13 once. (13 sc)
ROW 15: Working in sc, inc 1 st in last st. (14 sc)
ROW 16: Working in sc, inc 1 st in first st, sc in each sc across. (15 sc)
ROWS 17 & 18: Work even in sc.
ROW 19: Working in sc, dec 1 st at beg and end of row. (13 sc)
ROW 20: Repeat row 19 once. (11 sc)
ROW 21: Working in sc, dec 1 st at beg of row, sc in each of next 5 sc, sl st in next sc. End off.
Once the humdrum task of making the roast beast is safely in another sucker’s relative’s hands, you can turn your festive crochet skills to better effect.

Well, more spectacular effect, at any rate.
TOP

ROW 1: With wrong side facing, attach white in first sc, work a lp st in this sc and in each sc across (lp st: insert hook in st, wind yarn over left index finger from front to back, catch yarn with hook and pull through, drop lp from finger, yo and through 2 lps on hook – 1 lp st made), ch 1, turn each row. (17 lp sts)
ROW 2: Work even in sc.
ROW 3: Work even in lp st. End off.

FINISHING: Sew Christmas Stocking to lower left front of place mat with toe pointing to left (lp sts on top should be facing). Leave top edge open to hold napkin and silverware. Press with damp cloth blocking to size.
Don’t forget to crochet up some milk and cookies for Santa!

Low-cal, high-fiber, and completely carpet-safe! Santa’s going to be thrilled!*

*Handmade by Mother accepts no responsibility for the appearance of coal in your Christmas Stocking placemats, should you leave crocheted cookies out on Christmas Eve.


Click here for the printable pattern.

Thursday, December 9, 2010

O Tannenbaum Trouble

Christmas Tree Coasters from Crochet World Omnibook Christmas Special, 1980

Thanks to the Southern Pine Beetle, the Spruce Spider Mite, and the White Pine Weevil, live Christmas trees will soon be harder to find than an Xbox Kinect this Xmas Eve. But don’t let the imminent deforestation of North America destroy your holiday spirit!

During the Great Christmas Tree Shortage of 1980 (caused by newly-elected President Ronald Reagan cutting down several polluting pine trees), Gerrie Spensley crocheted these Christmas Tree Coasters so Santa would have somewhere to leave presents. After all, Old Saint Nick has proved in the past he isn’t picky about counterfeit conifers.

Alas, these temporary tannenbaums contained a fatal flaw.


In Gerrie’s defense, she’d always intended for her crocheted coasters to fall apart faster than a toy made in China. In an interview for Crochet World, Gerry explained that her “Versatile Christmas tree coaster set serves two purposes – it’s a decoration and the coasters can be taken off and put to practical use under glasses and as doilies.” What she didn’t realize was that nothing makes children cry faster than a Christmas Tree flattened by their parents love of Christmas Cosmos and Scroogedrivers.

Poor Gerrie wanted 1980 to be renowned as the Christmas Saved by Crafty Crocheters. Instead, it became known as the Christmas Mommy and Daddy’s Drinking Ruined the Christmas Tree.

Again.

For the complete pattern (and more snark!):

Christmas Tree Coasters
By Gerrie Spensley

MATERIALS: 1 skein of worsted weight yarn, variegated white to green; hook size F; small amount of red worsted; 30 small red beads; one ¼’’ wooden dowel, 6’’ long; one 3x3’’ square of wood for base.

STAND

Drill ¼’’ hole in wood square, put glue on the end of the dowel and insert the dowel in the hole. Stand may then be painted and a square of felt may be glued to the bottom of the stand.
While I’m not impressed with the final product, any crochet project that requires a drill is still made of awesome.

But whatever you do, don’t drink and drill.
TREE

The tree consists of six coasters with a large doily on the bottom that may be used under a candle or dish.
Work in back loop only throughout.
With variegated green:
RND 1: Ch 4, sl st in 1st ch, ch 3, make 15 dc in ring, join with sl st in top of ch 3.
RND 2: Ch 3, dc in each dc around, join.
RND 3: Ch 4, dc in same st, dc ch-1dc in each st around. Sl st in 3rd ch of first ch 4. Fasten off. Make six coasters.
In fact, it’s a bad idea to start slinging back the Christmas cocktails while knitting or crocheting too.


LARGE DOILY

Repeat above to rnd 2.
RND 3: Ch 3, dc in each st around, join.
RND 4: Ch 4, dc iin same st, dc ch-1 dc in each st around. Sl st in 3rd ch of first ch 4.
And if this pattern’s instructions to “dc ch-1 dc” is any indication, the first victim of editing drunk are the commas. Whereas, the cocaine fad in the 1980s killed the semi-colon.
RND 5: Ch 3, sl st to back of doily at bottom of first ruffle. Repeat rnd 4, making a double ruffle. Fasten off.

FINISHING: Sew a cluster of three of the red beads on each of the coasters. On the large doily, make 4 groups of three beads each and sew to doily, spacing them evenly. The beads should be sewn on the ruffle of the coasters and doily.
So, avoid imbibing your holiday spirits, and create your Christmas cheer with a rousing round of the traditional Carol: O Tannenbaum, o Tannenbaum, wie treu sind deine Blätter!

My grasp of German is a bit shaky, but I believe the literal translation is “O Christmas Tree, O Christmas Tree, how lovely are your bladders.”
RED BALL FOR TOP OF TREE
(Make two)

With red yarn ch 4, sl st in first ch. Ch 3, make 15 dc in ring. Join in first dc and fasten off. With red yarn sl around both circles, fastening them together. Leave 2 sts open to allow the ball to slip on top of the dowel. Assemble with the large doily on the bottom, then the six coasters, placing the red ball on top.
Crochet World also provided this festive drawing to remind you what a real Christmas Tree looks like.

“Hello ladies, look at your Crocheted Coaster Tree, now look at me, now look at your tree, now look at me, now look at your tree. Sadly, it isn’t me, but it will smell of Old Spice, vodka and disappointment.”

Click here for the printable pattern.

Tuesday, December 7, 2010

Slouching toward a Washable Bethlehem

Carefree Washable Wool Ad from Vogue Knitting, Holiday, 1986

CARING GIFTS IN CAREFREE, WASHABLE WOOL

Nothing's too good for that favorite kid.
But the other three? Meh. They can have stretched out old sweaters you picked up at the flea market.

And if the oldest complains that her Christmas sweater is way too long, just tell her that it’s a dress meant to be worn with tights. Then take lots of pictures to be used as blackmail in the future.

Good mothers plan ahead.
That’s why you’ll spend the time and love on a handmade gift. When wool’s your yarn choice, you can be sure that you’re giving the best. Wool’s warm, comfortable...
Assuming your definition of comfortable is “so itchy everyone will assume your child has fleas”.
...great looking, incredibly resilient – and it’s even washable. That’s our gift to you.
By the way, we’re expecting you to pay for this “gift”.
Because you care, we wouldn’t want you to put your effort into anything less than the best... Pure Washable Wool.
That’s right, use Pure Wool, or we’ll all know that you don’t put any effort into your impure knitting.
Check your favorite yarn store for pattern information and yarn with the washable wool label.
There’s a mysterious symbol on the bottom right of the ad... what could it mean?

To find out:


This ominous triple swirl is the Woolmark!

In 1964, a shadowy Australian organization known as the “International Wool Secretariat” secretly hatched a plan to take over the world by creating quality standards for wool.

Don’t look so surprised, everyone knows that Australia is the number one breeding ground for successful supervillains. The IWS is headed by Doctor Lanolin, usually pictured bald and stroking his pet wallaby, Mr. Hoppy. He (the doctor not the wallaby) decided to hold an international competition to create a recognizable new logo for the IWS. A logo which would then be tattooed onto everyone’s forehead during the Apocalypse, as a sign of their allegiance to the Antichrist!

No?

Oh, all right, a more scholarly (*cough*boring*cough*) account of the history of the Antichr... I mean, Woolmark Company can be found here.

But if you’re unprepared when the Australian supervillains begin their reign of terror, don’t come crying to me.


Wednesday, December 1, 2010

Happy Extraterrestrial Hanukkah!

UFO from Crochet World Omnibook Christmas Special, 1980

I know it’s hard to tell from this grainy, faded photo, but that’s not a plant hanger. That button down flap would guarantee my plants would die ... faster than usual.

I supposed you could store your dried herbs in this not-a-pot-hanger, but this isn’t a handy device for keeping your illicit substances out of the reach of your cats, either. And trust me, you’ll want to keep your weed away from Mr. Whiskers. It’s not a pretty sight when kitties get the munchies.


Where was I? Oh yes, this pattern is not a pot hanger, it’s a UFO. It says so right beneath the picture. UFO!

Which means it’s the perfect gift for your beloved Jewish nephew or niece this Hanukkah. After all, Hanukkah and outer space go together like latkes and sour cream.

Don’t believe me? Read on!

For the complete pattern (and proof of Hanukkah’s extraterrestrial awesomeness):

Tah dah, it’s a flying saucer menorah!

Clearly, the reason why the menorah stayed lit for eight whole days in the Temple of Jerusalem in 168 BCE was because God secretly spiked the tiny flask of olive oil with rocket fuel.

UFO!
Another toy in our Christmas collection is the whimsical space ship whose passengers are a tiny bunny, mouse and duck. UFO anyone?
Pay no attention to the word Christmas. Due to Santa’s longtime relationship with NORAD, it’s been proven beyond a shadow of a doubt that there’s no such thing as a Christmas UFO.

Not even in Nanaimo, British Columbia.
HANGING SPACE SHIP WITH POCKET TOYS/PILLOW TOY by Betty L. Leach

MATERIALS: No. 1 hook, 4-ply knitting worsted weight yarn, 4 oz. color A for bottom and hatch cover, 2 oz. color B for top section, 1 oz. color C for inside section. One half-pound polyester fiberfill for stuffing, scraps of pink, orange and black felt, 6 moveable eyes, ¼’’ diameter; white glue, 3 buttons or bone rings (1/2’’); one ounce each of yellow, gray & white yarn for toys; 1 yard carpet warp for whiskers.

SIZE: Base diameter 10 ½’’; hatch cover diameter 6’’.
I have no idea why a bunny, mouse and duck have gone for a ride in the UFO. However, I’m sure it bolsters my argument that this is a Hanukkah UFO, not a Christmas one.

After all, everyone knows duckies are an integral part of Hanukkah celebrations.


LOWER SECTION: With color A, ch 2, 6 sc in 2nd ch from hook – do not join.
RND 2: 2 sc in each sc – 12 sc.
RND 3: * Sc in next sc, 2 sc in next sc. Repeat from * around – 18 sc.
RND 4: * Sc in next 2 sc, 2 sc in next sc. Repeat from * around – 24 sc.
RND 5: * Sc in next 3 sc, 2 sc in next sc. Repeat from * around – 30 sc.
NEXT RNDS: Repeat round 5, increasing 6 sts evenly spaced, until piece measures approximately 11’’ or you have a total of 120 sts.
But don’t exactly repeat round 5, or you’ll end up with many more than 6 increase sts around your UFO. And then it won’t fly.

Well, your UFO won’t fly anyway, but you’ll still want it to look flight worthy. Otherwise, you’ll never get a government grant.

Go ahead, click on the cartoon. You know you want to!
LAST RND: Sc in first point, ch 5, sc in next sc, sc in each sc around making ch 5 loops in every other increase point – 3 points with ch 5 loops. Join with sl st and end off. Set aside.

UPPER SECTION: With color B ch 54, join with sl st to form ring. Ch 3, dc in each ch around. Join with sl st to top of ch 3.
RND 2: Ch 3, dc in each dc around, join as before.
RND 3: Repeat rnd 2.
RND 4: * Sc in next 8 dc, 2 sc in next dc, repeat from * around – do not join.
RND 5: * Sc in next 9 sc, 2 sc in next sc. Repeat from * around.
Continue increasing 6 sc evenly spaced around in this manner, until there are a total of 120 scs.
LAST RND: Sc in each sc around, join with sl st – do not end off. Match points of top and bottom sections, wrong sides together, “reverse” sc around matching stitches of both sections and making sure the ch 5 loops are to the outside. End off.

COCKPIT: With color C with right side facing, join yarn in any dc. Ch 3, dc in each st around, join in top of ch 3. 54 dc (counting ch 3 as first dc).
RND 2: Ch 1, * sc in next 6 dc, decrease 1 st. Repeat from * around, join in ch 1 – 48 sc.
RND 3: Ch 1, * sc in next 3 sc, dec 1. Repeat from * around. Join as before.
RND 4: Repeat rnd 3.
RND 5: Repeat rnd 3. Stuff lower section firmly up to rnd 1 of top section, make divot in center to hold pocket toys.
RND 6: Repeat rnd 3 until 2 sts remain, end off. Sew opening closed. Push inside of cockpit down.
When you’re done crocheting the cockpit of your spacecraft, don’t forget to drop a tiny dreidel inside for the ducky, bunny and mouse to play with. Astronauts love playing with dreidels.

So do certain other spacemen, though I’m a bit concerned about the way Kirk is looking at Spock.
HATCH COVER: With color A, work as lower section until cover measures approximately 7’’ or will cover cockpit area.
LAST ROW: Sc in each sc, making ch 5 loops at every other corner, as before on lower section. Join, end off.

FINISHING: Take 1 strand of colors A and B, leave a 5’’ length, ch 200. End off leaving another 5’’ length. Go back to center of ch length, join yarn in center st and ch 100. End off leaving a 5’’ length of yarn. Join each of the 3 ends of chain to ch 5 loops on lower edge of space ship, tie securely. Sew buttons or crochet covered bone rings to top edge of space ship. Button on hatch cover.

FOR PILLOW TOY: Omit hanging chain and ch 5 loops on lower section.


POCKET TOYS: Make three 2 ½’’ pompons, 1 gray, 1 yellow, 1 white. Trim evenly. Cut ears for bunny and mouse from pink felt and beak for duck from orange felt. Sew felt pieces into position on pompons.
Good luck sewing anything onto a pompon!

What’s wrong with glue, anyway?
Glue eyes on each pompon,
Glue’s good enough for the eyes!
...arrange in cockpit. Make 1 – 1’’ pompon for bunny tail. Ch 20 for mouse tail.
Use white carpet warp for bunny whispers and black or brown carpet warp for mouse whiskers.
And now you’re all ready to launch your fuzzy friends into space for an out-of-this world Hanukkah celebration!

Just don’t do it in front of your planet bound pets, or they’ll sulk for eight days straight.


Click here for the printable pattern.